How to add a Query List to a Dashboard

Query Lists give Certero customers complete control and flexibility over what data is displayed across your dashboards.
There are several different components that can be added as part of a Query List . These are:
Entity | An item from the standard menu such as the Microsoft Windows item from the Computer Systems menu |
Saved Items | A saved query from a chart |
Data Groups | Dynamic Groups, Static Groups & Custom Groups. |
Adding the items into the Query List is a clean and easy process.
1. Navigate to your chosen Dashboard.
2. Click "Edit"

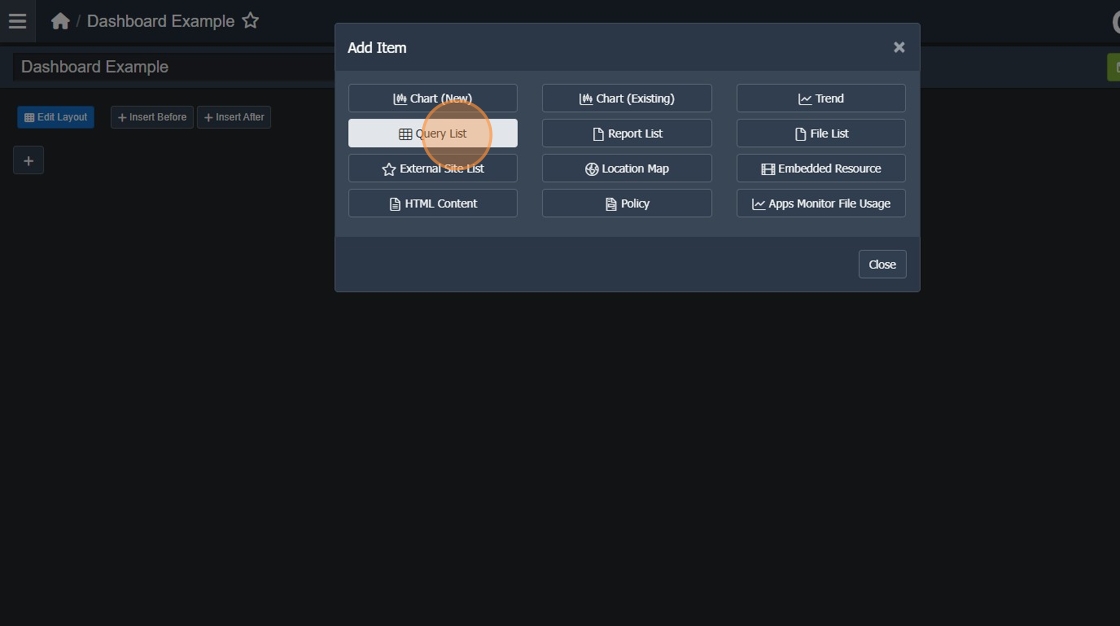
3. Click this button.

4. Click "Query List"
5. Type a name for your Query List.
6. Click "OK"

7. Click + to add data types.

8. Click "Data Type"

9. Select all items you want included in your query list.

10. Click "OK"

11. Your Query List starts off as a 'List View'.

12. Typically customers prefer the 'Tiles' view, select which view works for you.

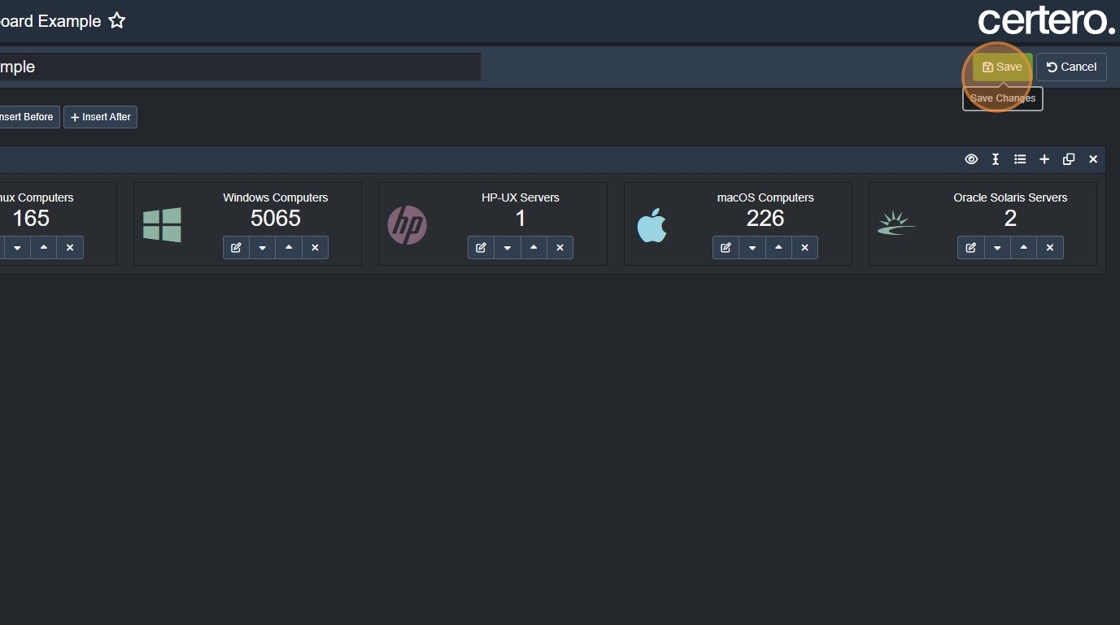
13. Click "Save" to apply your changes.
14. Once you have added a Query List, you can make further changes to them in order to get a more tailored and efficient picture of your data.
In the following example, we will remove Windows Servers to create a Windows Workstations item.
15. Click "Edit"

16. Click here.

17. Enter in a title for your Query Item.

18. Click "Grid Filter"

19. Click "Operating System"

20. Click the magnifying glass, select "Does not contain"
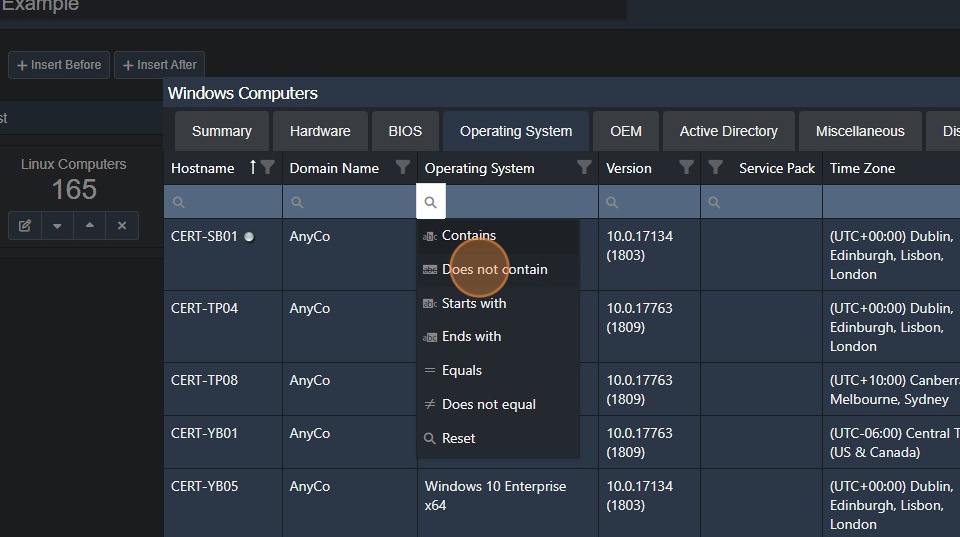
21. Type "server"
22. Click "Apply"

23. Click "OK"

24. Click "Save" to apply your changes.
